Building a GUI platform - Action-State using zig and raylib
~15 mins reading time
This is my experience from developing a GUI in roc using zig for the platform and raylib for the graphics library.
I hope you find it useful, and I encourage anyone interested to build a platform as a great way to learn more about roc.
The inspiration for this experiment comes from Richard Feldman's draft Design Idea: Action-State.
In Action-State, Richard outlines an idea for User-Interfaces (UI) using roc. His idea is similar to, but different from, how UI are built in Elm with The Elm Architecture (TEA). It is tailored for plugins with an Init and Render function, instead of the Model, View, Update found in TEA.
These are the steps I cover in this article.
My Goals
- Learn more about Roc, platform dev, and have fun
- Implement a zig platform that uses raylib for graphics
- Explore the Action-State design idea
Demonstration of the application
To see the code for this application see the section at the end of this article or the repository.
This is a minimal implementation of the Counter Example used in the Action-State design idea.
Each of the three counters has their own state implemented as an opaque type Counter that wraps an I64 value.
Counter := I64

init : I64 -> Counter
init = @Counter

render : Counter, Color -> Elem Counter
render = \@Counter state, color ->
    GUI.col [
        GUI.button {
            text: "+",
            onPress: \@Counter prev -> Action.update (@Counter (prev + 1)),
        },
        GUI.text {
            label: "Clicked $(Num.toStr state) times",
            color,
        },
        GUI.button {
            text: "-",
            onPress: \@Counter prev -> Action.update (@Counter (prev - 1)),
        },
    ]
The three counters shown in the window are being modified independently. Their state is retained in the application Model as follows.
Model : {
    left : Counter,
    middle : Counter,
    right : Counter,
}
When a user clicks one of the buttons, the state of the Counter in the Model is updated using an Action. Here is how this is implemented for the increment button:
GUI.button {
    text: "+",
    onPress: \@Counter prev -> Action.update (@Counter (prev + 1)),
},
A user click is detected by the platform, which then is responsible for calling the provided onPress function. onPress receives the previous state, and returns an action with the new state of the Counter.
For describing the UI for a GUI application, and handling actions such as a button press, I think this approach is nice.
For the rest of this article, I'll dive into the behind-the-scenes details for the GUI platform, and discuss the steps I took to develop it. An application author using this GUI platform doesn't need to deal with any of these lower-level details, however, this is the part of my journey I found to be the most interesting.
Development of the platform
The platform code isn't polished, I've been iterating on API ideas and generally exploring new things. There is a lot more for me to learn about roc, zig, and platform development. However, I want to share what I have, flaws and all, for the benefit of others.
This platform could become useful for building cross-platform GUIs with roc someday, however there is still a lot of work to do. I don't see any major blocking issues, and look forward to working on this further.
In the sections below, I discuss various topics relating to platforms and applications. If you would like to learn more about these then check out the offical guide.
I have gained most of my knowledge through experiments and assistance from the community, and I highly recommend reaching out on roc zulip if you have any questions.
Also, when developing this platform I used roc, zig version 0.11.0, and raylib which may be useful if you woudl like to clone the repository and try it out for yourself.
P.S. If you're reading this and have any interest in writing a layout algorithm for GUI's in pure roc, then please let me know. This would help make this even more awesome!
Step 1 minimal platform
To get started, I copied and modified another platform to suit raylib. I combined different parts from roc-wasm4, roc-zig-package-experiment, and roc-lang/platform-switching. I wanted the API from roc-wasm and the implementation for the low-level parts from the platform-switching example.
I want application authors to use just roc run and have a working application. If I can avoid complicated build dependencies or setup I think this would be a more friendly platform to use.
To do this the platform needs to generate the pre-built files e.g. macos-arm64.a using a build.zig script. These binaries can then be packaged into a .tar suitable for distribution using roc build --bundle .tar.br platform/main.roc. This package also includes the roc source code, as this is the API applications use for this platform.
Cross-compiling for different architectures using zig is easy, so I hope that including raylib and necessary dependencies in this platform will be easy to build static libraries for the prebuilt-binaries. When a roc application uses a platform from a URL, roc uses the prebuilt-binary. This means application authors don't need to have the zig host toolchain installed.
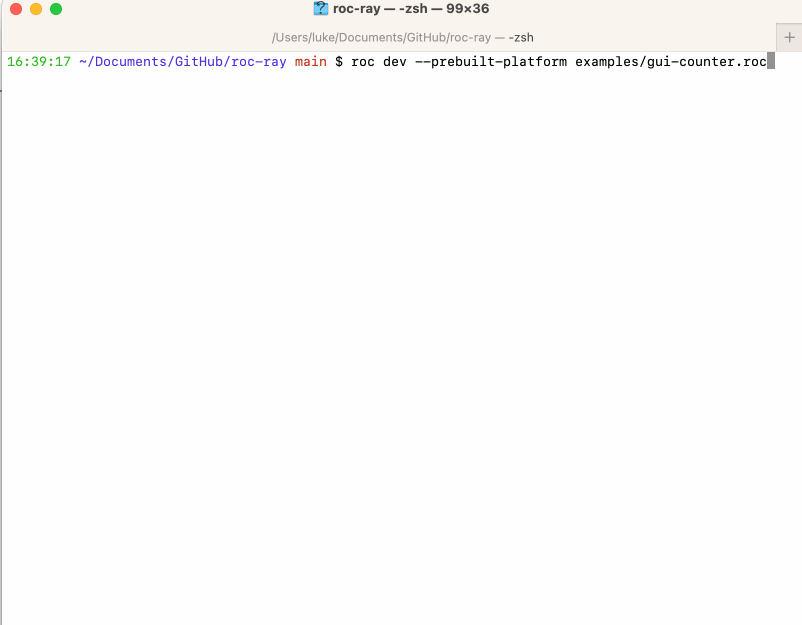
Using roc dev --prebuilt-platform example.roc runs the application. The roc cli finds the prebuilt-platform at a relative path e.g. packages { ray: "../platform/main.roc" }. The platform is built separately from the roc application.
For developing a minimal platform to start with, I chose not to include raylib or call into roc from zig. The main function in platform/host.zig printed "hello,world" just to test the platform built correctly.
Step 2 raylib library
Next, I followed the instructions in https://github.com/ryupold/raylib.zig to add raylib to the platform and implement the example from the README.
I updated build.zig and made minor changes so the libraries would build and link with roc. The main function in platform/host.zig was updated with the raylib example. It still didn't call into roc at this stage.
I wasn't able to get this working on my own, so I reached out to Brendan Hansknecht, who provided assistance with linking and missing symbols.
Below is the zig raylib example which I copied into my platform/host.zig alongside the other host functions like roc_alloc and roc_panic. Running the app with roc dev displayed the raylib example in a window with "hello world!" printed in yellow text.
// other functions above like roc_alloc, roc_dealloc, roc_panic etc
// copied from platform-switching example
// ...
const raylib = @;
pub fn void
The roc app and platform API weren't doing anything useful at this stage. I had a script to build my platform into a static library. Roc could build the app and link it with the platform. The app displayed the raylib example in a window. However, the host wasn't actually calling into roc.
Step 3 roc <-> host interface
The mainForHost function in platform/main.roc defines the interface between roc and the zig host. I copied the platform, including both the roc and zig parts, from roc-wasm4. This meant I was able to re-use these implementations for calling into roc in platform/host.zig.
The zig host is responsible for calling roc__mainForHost_1_exposed_generic which is generated by roc and returns a struct containing two functions init and update. This is defined in platform/main.roc and represents the interface between roc and the host.
Note the design for platforms is currently evolving, so how this is done in future may change significantly.
ProgramForHost : {
    init : Task (Box Model) [],
    update : Box Model -> Task (Box Model) [],
}

mainForHost : ProgramForHost
mainForHost = { init, update }
Both of the functions in ProgramForHost provide a boxed representation of the app's Model to the host. Boxing the model stores the Model on the heap which enables roc to provide the host with an opaque pointer to the the Model.
The platform is unable to know the size or shape of Model, as this is defined in the application and provided to the platform. The host receives a pointer to a Model by calling init, which it can then pass back to roc in a future call to update. This is how a roc application is able to retain the state between calls.
Aside glue & LLVM IR
In the future platform authors will use roc glue to generate all of the relevant types and glue code for their platform, including the roc builtins (or standard library). However, this feature is still in development and there isn't a glue-spec written for zig yet.
So, in the interim, I found it useful to generate the LLVM IR representation for a platform by running roc build --emit-llvm-ir --no-link examples/gui-counter.roc. This produces a gui-counter.ll file which contains the IR for the application and platform without the host.
For example, the generated LLVM IR for roc__mainForHost_1_exposed_generic is:
define void @ !dbg !667
Which is represented in platform/host.zig as:
extern fn void;
By inspecting the LLVM IR I could see the shape of the generated functions and thier implementation for LLVM which assisted me with extern definitions in the platform.
Step 4 calling roc
I implementated the calls into roc in platform/host.zig as follows:
// MODEL
var model: *anyopaque = undefined;
// CALL ROC INIT
const size = @;
const captures = ;
defer ;
;
;
const update_task_size = @;
var update_captures = ;
// CALL ROC UPDATE
;
;
I only have a surface-level appreciation for how this works, so I am not going to try and explain it any further here. However, I have always found people in the beginner channel on roc zulip to be friendly and helpful whenever I ask any questions.
Thank you to Brendan Hansknecht for helping me with this.
Step 5 adding an effect
To confirm roc was being called correctly, and that it could work with raylib I needed an Effect.
I chose to give roc the ability to set the window size, as this looked relatively simple to implement. So, first I added the effect in the platform.
From an application author's perspective, this looks like a function that returns a Task that cannot fail and returns the empty {} value. Within the platform, this is implemented using an Effect.
# platform/Effect.roc
setWindowSize : I32, I32 -> Effect {}

# platform/Task.roc, since moved to platform/Core.roc
setWindowSize : { width : F32, height : F32 } -> Task {} []
setWindowSize = \{ width, height } ->
    Effect.setWindowSize (Num.round width) (Num.round height)
    |> Effect.map Ok
    |> InternalTask.fromEffect
This is how it is used in the demo application.
init : Task Model []
init =

    {} <- Core.setWindowSize { width, height } |> Task.await

    # ...
Note the host receives two I32 values which is what raylib requires. However, for application authors, I have exposed an API that expects two F32 in a record. My hypothesis is that a record will be more explicit for what these arguments do, and F32's will simplify using these values across the app without having a lot of calls to Num.toI32 or Num.toF32.
Finally, this Effect is implemented in platform/host.zig so that roc will link against this and can call this function in the host.
export fn void
This is how roc will call into the host. Note that the host first calls into roc with init or update, and then these Effects enable roc to call back into the host for impure operations like writing to a file, or requesting a change in window size.
Step 6 roc <-> roc interface
The platform exposes an API for an application to interact with. The application provides an implementation and provides the types and functions required by the platform. This is the interface between the application and the platform and is defined in platform/main.roc.
For this platform the header part requires { Model } { main : Program Model }, indicates that the Model and main are to be provided by the application.
We define Program state in platform/Core.roc to the following, which is similar to the ProgramForHost described in Step 3 roc <-> host interface, however now the state is a type variable instead of a boxed Model.
Program state : {
    init : Task state [],
    render : state -> Task state [],
}
Here, the app provides two functions init and render to the platform. These both return a Task Model [] which provides the Model that will be used in the next update.
In the demo application this is implemented as follows:
# examples/gui-counter.roc
app "counter"
    # ...
    provides [main, Model] to ray # from application to platform

# the application's state
Model : { left : Counter, middle : Counter, right : Counter }

# to the platform
main : Program Model
main = { init, render }

# returns a Model and does not fail
init : Task Model []

# takes a Model and returns a new Model
render : Model -> Task Model []
Recall from earlier that the interface with the host, ProgramForHost, provides a boxed representation of the app's Model. This is achieved within the platform by transforming the init and update provided by the application as follows:
# platform/main.roc
platform "roc-ray"
    requires { Model } { main : Program Model } # from application
    # ...
    provides [mainForHost] # to host

# interface with the host
ProgramForHost : {
    init : Task (Box Model) [],
    update : Box Model -> Task (Box Model) [],
}

mainForHost : ProgramForHost
mainForHost = { init, update }

# transform main.init provided by the application
init : Task (Box Model) []
init = main.init |> Task.map Box.box

# transform main.render provided by the application
update : Box Model -> Task (Box Model) []
update = \boxedModel ->
    boxedModel
    |> Box.unbox
    |> main.render
    |> Task.map Box.box
Note the model is unboxed and then boxed when calling the render provided by the application.
Reflection
I have enjoyed building this platform and am pleasantly surprised that this works as well as it does. I've learnt a lot about roc and platform development.
The raylib functionality is limited to just a handful of calls, so there is still a lot of work to produce something that utilises the available capability within the library.
The Action-State implementation is very minimal with significant aspects that still need to be explored.
Further work could include;
- an API that is effect agnostic and works e.g. both native desktop and editor plugins
- performance optimisations
- state change in a child affecting the state of a parent
- modify the API and implement something like
fromTask : Task ok err, (Result ok err -> (Result state [Removed]* -> Action state)) -> Action stateto run tasks asynchronously in event handlers instead of the update Fn
Thank you for reading. Please let me know if you have enjoyed this or would like to assist with further exploration using this platform.
Source code
full source code at https://github.com/lukewilliamboswell/roc-ray
Below is a copy of the demo application at the time of writing.
# gui-counter.roc
app "counter"
    packages { ray: "../platform/main.roc" }
    imports [
        ray.Task.{ Task },
        ray.Action.{ Action },
        ray.Core.{ Program, Color, Rectangle },
        ray.GUI.{ Elem },
        Counter.{ Counter },
    ]
    provides [main, Model] to ray

Model : {
    left : Counter,
    middle : Counter,
    right : Counter,
}

main : Program Model
main = { init, render }

init : Task Model []
init =

    {} <- Core.setWindowSize { width, height } |> Task.await
    {} <- Core.setWindowTitle "GUI Counter demo" |> Task.await

    Task.ok {
        left: Counter.init 10,
        middle: Counter.init 20,
        right: Counter.init 30,
    }

render : Model -> Task Model []
render = \model ->

    # this is a temporary workaround for a bug `Error in alias analysis: error in module...`
    # sometimes we need an extra Task in the chain to prevent this error
    _ <- Core.getMousePosition |> Task.await

    GUI.col [
        GUI.text { label: "Click below to change the counters, press ESC to exit", color: black },
        GUI.row [
            GUI.translate (Counter.render model.left red) .left \record, count -> { record & left: count },
            GUI.translate (Counter.render model.middle green) .middle \record, count -> { record & middle: count },
            GUI.translate (Counter.render model.right blue) .right \record, count -> { record & right: count },
        ],
    ]
    |> GUI.window { title: "Window", onClose: \_ -> Action.none }
    |> GUI.draw model {
        x: width / 8,
        y: height / 8,
        width: width * 6 / 8,
        height: height * 6 / 8,
    }

width = 800
height = 600
black = { r: 0, g: 0, b: 0, a: 255 }
blue = { r: 29, g: 66, b: 137, a: 255 }
red = { r: 211, g: 39, b: 62, a: 255 }
green = { r: 0, g: 59, b: 73, a: 255 }
# Counter.roc
interface Counter
    exposes [Counter, init, render]
    imports [ray.Action.{ Action }, ray.Core.{ Color }, ray.GUI.{ Elem }]

Counter := I64

init : I64 -> Counter
init = @Counter

render : Counter, Color -> Elem Counter
render = \@Counter state, color ->
    GUI.col [
        GUI.button {
            text: "+",
            onPress: \@Counter prev -> Action.update (@Counter (prev + 1)),
        },
        GUI.text {
            label: "Clicked $(Num.toStr state) times",
            color,
        },
        GUI.button {
            text: "-",
            onPress: \@Counter prev -> Action.update (@Counter (prev - 1)),
        },
    ]